Face detection with OpenCV
I've been meaning to take a look at OpenCV for a little while now. OpenCV (open source computer vision), is a library mainly aimed at real-time computer vision. It can be used for a wide range of tasks including gesture recognition, motion tracking and augmented reality. For this post I'm going to go through doing basic face detection.
Face detection is trying to answer the question, is there a face and if so where? This is distinct from facial recognition, which is trying to answer the question, who does this face belong to? With that out the way onto some code.
Installing OpenCV
OpenCV is available from the CentOS repositories. As a result it can just be installed with the package manager:
yum install opencv opencv-python
Note: at the time of writing CentOS provides OpenCV version 2.4.5. If you need a later version, it can be installed from source.
Loading an image
Before doing any face detection we first need to load an image. This is just a
case of importing the cv2 module and calling imread to
load an image:
import cv2
img = cv2.imread('cat.jpg')
If you are working in a graphical environment you display the loaded image using imshow:
cv2.imshow('Cat', img)
cv2.waitKey(0)
cv2.destroyAllWindows()
Note: waitKey is used to keep the image on screen until a key is pressed. destroyAllWindows is then used to remove the window.
Assuming you have a suitable cat image in place, the output should look something like this:

Photograph by and copyright © of David Corby. This image is licensed under the Creative Commons Attribution-Share Alike 3.0 Unported license and can be found on Wikimedia Commons.
Detecting faces
To detect faces we need to use a Haar classifier cascade. OpenCV provides a number of classifiers, including a classifier for face detection. This can be loaded using the Cascade Classification class:
import cv2

face_cascade_xml = \
  '/usr/share/OpenCV/haarcascades/haarcascade_frontalface_default.xml'
face_cascade = cv2.CascadeClassifier(face_cascade_xml)
Haar classifier cascades work on CV_8Y (gray scale) images. Colour images can
be converted using cvtColor:
img = cv2.imread('face.jpg')
gray = cv2.cvtColor(img, cv2.COLOR_BGR2GRAY)
Once we have a gray scale version of the image, detectMultiScale can be use to return a list of rectangles that match the cascade:
faces = face_cascade.detectMultiScale(gray)
Note: additional parameters like scaleFactor and minNeighbors can be
passed to control how sensitive the detection is.
Showing results
Once we have a list of matches, they can be plotted using the OpenCV rectangle function:
for (x, y, width, height) in faces:
    cv2.rectangle(img, (x, y), (x + width, y + height), (0, 255, 0), 1)

cv2.imshow('Faces (%d)' % len(faces), img)
cv2.waitKey(0)
cv2.destroyAllWindows()
If everything goes well, running the final script should now highlight faces:
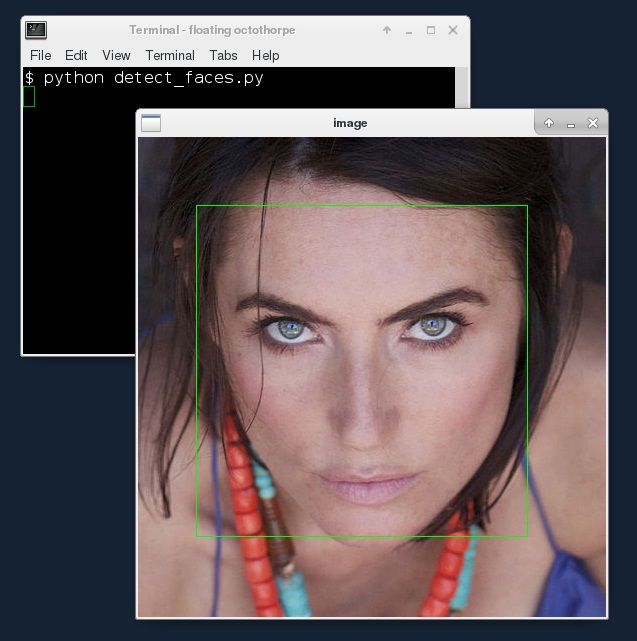
Photograph by and copyright © of Kinga Philipps. This image is licensed under the Creative Commons Attribution-Share Alike 3.0 Unported license and can be found on Wikimedia Commons.