Kickstarting a CentOS VM
Automating Fedora based distributions is pretty straightforward. This post is quickly going to go through using a kickstart file to build a CentOS virtual machine.
Although it doesn't take too long to run through Anaconda's installation screens, it's nice to be able to automate installations for a few reasons:
- Repeatability: using a kickstart file cuts out human interaction, so builds should be repeatable and consistent.
- Effort: cutting out human interaction makes the build process far easier, although some effort is required initially to setup the kickstart file.
- Time: kickstarting a system should be slightly faster, however the main benefit is no interaction is required once the build starts. This leaves you free to do other things while the installation runs.
Software
The steps below use the following software:
- CentOS 7.2, more specifically the CentOS Everything iso.
- VirtualBox to run the virtual machine.
- Python to serve the kickstart file via http.
Note: the sha256 checksum of the CentOS iso should be:
148449e661535f52aa846aa4a0112798f9153df8526b83e76075560a1de3accf
The kickstart file
A kickstart file is a single text file with all the information Anaconda needs to carry out an installation. The example below is fairly simple, however the Red Hat documentation has more detail on additional commands and options:
# System authorization information and root password hash
auth --enableshadow --passalgo=sha512
rootpw --iscrypted $6$g418WpDO$MK2rgLiYkx4BwtX/ssid4HKGMEG05wqO52b.mYIvjrSHXC/HauCgh4FLO2zg3poar/4tNBsieO8tdwPunI6jE.

# Use CDROM installation media and perform a text install
cdrom
text

# Use GB for keyboard layout and system language
keyboard --vckeymap=gb --xlayouts='gb'
lang en_GB.UTF-8

# Set timezone
timezone Europe/London --isUtc

# Network information
network  --bootproto=dhcp --device=enp0s3 --onboot=on --ipv6=auto
network  --hostname=localhost.localdomain

# Clear any existing partitions and use autopart on the first disk
zerombr
clearpart --all --initlabel
autopart --type=lvm
bootloader --location=mbr --boot-drive=sda

# Reboot after installation completes
reboot --eject

# Install the core package group and vim, but exclude wifi firmware packages
%packages
@core
vim
-iw*-firmware
%end

# Disable kdump
%addon com_redhat_kdump --disable --reserve-mb='auto'
%end

# Copy the kernel parameters using during installation for future reference
%post
cp /proc/cmdline /root/ks_cmdline
%end
Note: the root password being set above is "example". If you use this kickstart file, make sure you change the password hash.
Installation steps
Create a virtual machine
In Virtual Box create a new virtual machine. For this example I gave the virtual machine the following specs:
- 1 CPU core
- 1GB of RAM
- 1 8GB disk
Start a web server
During the build process the virtual machine will need to download the
kickstart file. Switch to the directory containing the kickstart file and run
python -m http.server:
$ python -m http.server
Serving HTTP on 0.0.0.0 port 8000 ...
Note: if you are using python 2.x run python -m SimpleHTTPServer instead.
Starting the installation
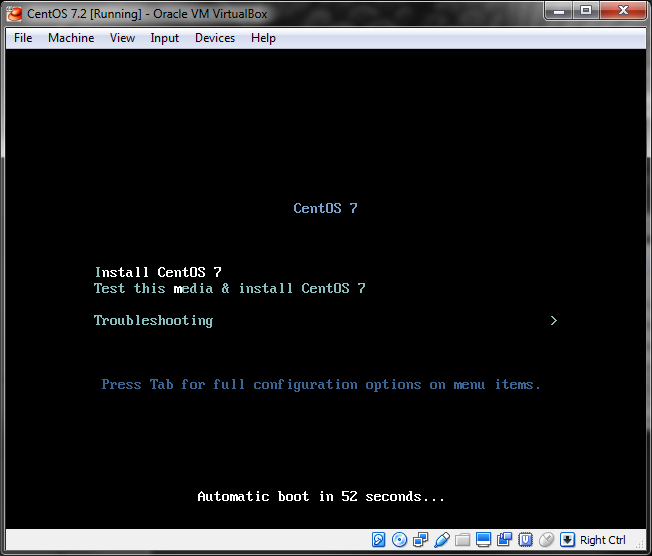
Boot the virtual machine from the CentOS iso
(CentOS-7-x86_64-Everything-1511.iso). After a few seconds you should see a
grub menu similar to the following:

Select the Install CentOS 7 option and press tab. Add
inst.ks=<kickstart url> to the end of the kernel parameters. The full line
should look something like this:
vmlinuz initrd=initrd.img inst.stage2=hd:LABEL=CentOS\x207\x20x86_64 quiet inst.ks=http://192.168.56.1:8000/anaconda-ks.cfg
The exact URL you use for the kickstart file will depend on your VirtualBox network config. If you're unsure check the URL in a web browser.
Finally hit enter and wait for the system to build. If everything goes well you should have a new CentOS VM after five minutes or so.
