Setting up Syncthing on Raspbian
Syncthing is a decentralised file synchronization application written in Go. As well as being free open source software, it's available for a wide range of platforms including Windows, GNU/Linux and Android. This post is going to quickly go over setting up Syncthing on a Raspberry Pi running Raspbian.
Installation
Pre-compiles Debian packages for ARM can be installed from apt.syncthing.net with the following steps:
-
Make sure
apt-transport-httpsis available:dpkg -l apt-transport-https || sudo apt-get install apt-transport-https -
Import the Syncthing PGP key into apt:
curl -s https://syncthing.net/release-key.txt | sudo apt-key add - -
Add the stable Syncthing channel to the apt sources list:
echo "deb https://apt.syncthing.net/ syncthing stable" | \ sudo tee /etc/apt/sources.list.d/syncthing.list -
Finally install the
syncthingpackage with apt:sudo apt-get update sudo apt-get install syncthing
systemd configuration
At this point you should be able to run Syncthing as a normal user. Alternatively Syncthing can be started by systemd at boot. To do this, first create a user account to run Syncthing:
useradd --create-home syncthing
Next copy the systemd unit file from /lib/systemd/system/:
cp /lib/systemd/system/[email protected] \
   /etc/systemd/system/[email protected]
Note: you should append the username of the user running the service after
this @.
Once the unit file is ready, reload systemd to pick up the change:
systemctl daemon-reload
Then enable and start the service:
systemctl enable [email protected]
systemctl start [email protected]
At this point if everything has gone well the service should be up and running.
You can check with systemctl:
systemctl status [email protected]
Connecting to the Web UI
Once Syncthing is up and running, it will start running a local web server. The easiest way to connect if you're running a headless setup, is forwarding the local port with an SSH command similar to the following:
ssh -L 8384:localhost:8384 pi@raspberrypi
Once the port had been forwarded, you should be able to point a web browser at http://localhost:8384/ and get a web interface similar to the following:
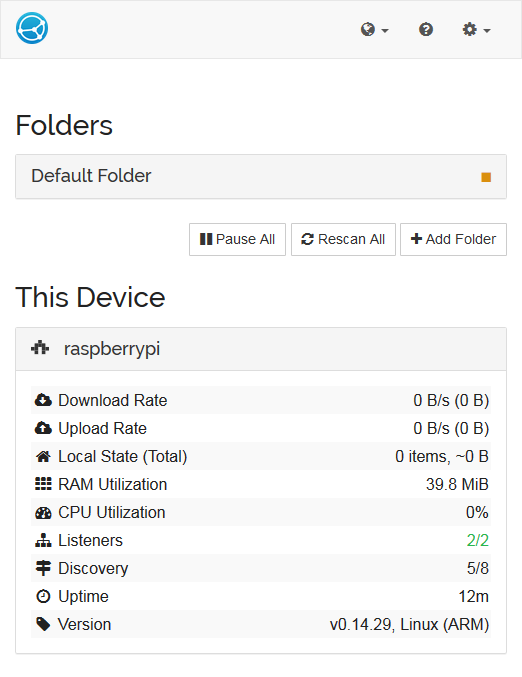
From here you can go ahead and setup shares, and any additional Syncthing configuration. For more information refer to the Syncthing docs.
Iptables rules
Finally if you're running iptables, you will want to add rules to allow traffic to Syncthing. Syncthing uses two ports for replication:
-
22000/TCP: by default Syncthing listens for new connections on this port, and uses it to replicate files.
-
21027/UDP: this port is used for host discovery.
Note: by default Syncthing will try to use IPv4 and IPv6.
Commands similar to the following can be used to add new iptables rules:
iptables -A INPUT -p tcp -m tcp --dport 22000 -j ACCEPT \
         -m comment --comment "Allow syncthing"
iptables -A INPUT -p udp -m udp --dport 21027 -j ACCEPT \
         -m comment --comment "Allow syncthing discovery"

ip6tables -A INPUT -p tcp -m tcp --dport 22000 -j ACCEPT \
          -m comment --comment "Allow syncthing"
ip6tables -A INPUT -p udp -m udp --dport 21027 -j ACCEPT \
          -m comment --comment "Allow syncthing discovery"
After adding the rules, make sure you run iptables-save and ip6tables-save
to make the rules persistent.
Further reading
If you want more information on Syncthing, the official docs are a good place to start. You can also view the entire code base, along with open issues, etc, on Github.