Writing snake in JavaScript
Snake as a game concept is over 40 years old! The concept was originally introduced by Blockade, however there have since been many clones and variations. Following on in that tradition, this post is going to look at making snake using JavaScript and the Canvas API.
Boiler plate HTML
The first step is to create a simple HTML page similar to the following:
<!DOCTYPE html>
<html>
<head>
  <title>Snake</title>
  <meta charset="utf-8" />
</head>
<body>
  <canvas id="game"></canvas>
  <script>
  </script>
</body>
</html>
Note: the <canvas> element has an id attribute so it can easily be
referenced later.
Game variables
For the game to work, it needs to track a few variables. For this example all
variables are going to be stored in a game object:
function init(game) {
  game.canvas = document.getElementById("game");
  game.ctx = game.canvas.getContext("2d");
  game.tile_width = 10;
  game.width = 40;
  game.height = 40;
  game.fps = 15;
  game.keys = {};
  game.snake = [
    {"x": 6, "y": 16},
    {"x": 6, "y": 17},
    {"x": 6, "y": 18},
    {"x": 6, "y": 19}
  ];
  game.snake_vx = 0;
  game.snake_vy = -1;

  game.food = {"x": 24, "y": 10};

  game.canvas.width = game.width * game.tile_width;
  game.canvas.height = game.height * game.tile_width;
}

window.onload = function() {
  let game = {};

  init(game);
};
The position of the food and snake tiles are stored as x, y co-ordinates, with (0, 0) as the top left most tile.
Adding a game loop
The next step is to add a game loop, this can be done using the setInterval function:
function render(game) {
}

function logic(game) {
}

window.onload = function() {
  let game = {};

  init(game);
  window.setInterval(function() {
    logic(game);
    render(game);
  }, 1000 / game.fps);
};
The code above will call the logic and the render functions roughly 15
times a second.
Rendering the game
A very simple render function might look something like this:
function render(game) {
  let ctx = game.ctx;

  ctx.fillStyle = "black";
  ctx.fillRect(0, 0, game.canvas.width, game.canvas.height);

  ctx.fillStyle = "green";
  for (let i = 0; i < game.snake.length; i += 1) {
    ctx.fillRect(
      game.snake[i].x * game.tile_width,
      game.snake[i].y * game.tile_width,
      game.tile_width - 1,
      game.tile_width - 1
    );
  }
  ctx.fillStyle = "red";
  ctx.fillRect(
    game.food.x * game.tile_width,
    game.food.y * game.tile_width,
    game.tile_width - 1,
    game.tile_width - 1
  );
}
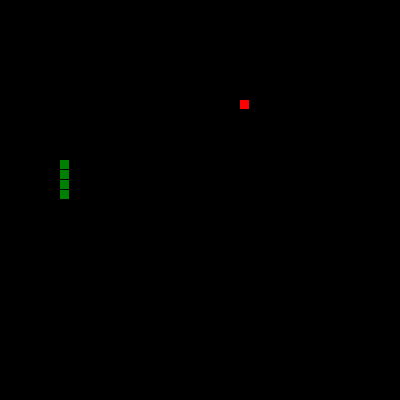
In the code above three elements are rendered:
-
First the background is set to black, this needs to be done every time a frame is rendered, both to set the background colour, and to hide any previously rendered frames.
-
The segments of the snake are then rendered.
-
Finally the snake food is rendered.
Once the render function is in place the initial state of the canvas should look something like the following:
Listening for key events
Before moving on to the game logic, two functions are added to capture key events:
window.onload = function() {
  let game = {};

  init(game);
  window.onkeyup = function(key_event) {
    game.keys[key_event.keyCode] = false;
  };
  window.onkeydown = function(key_event) {
    game.keys[key_event.keyCode] = true;
  };
  window.setInterval(function() {
    logic(game);
    render(game);
  }, 1000 / game.fps);
};
These functions update the keys object when keys are pressed or released.
This will make it easy to decide which direction the snake should move in the
game logic.
Adding game logic
Once the key listeners are in place the logic function can be updated to look
something like the following:
function logic(game) {

  if (game.keys[37] && game.snake_vx === 0) {
    // Left
    game.snake_vx = -1;
    game.snake_vy = 0;
  } else if (game.keys[38] && game.snake_vy === 0) {
    // Up
    game.snake_vx = 0;
    game.snake_vy = -1;
  } else if (game.keys[39] && game.snake_vx === 0) {
    // Right
    game.snake_vx = 1;
    game.snake_vy = 0;
  } else if (game.keys[40] && game.snake_vy === 0) {
    // Down
    game.snake_vx = 0;
    game.snake_vy = 1;
  }

  // Move head
  let next = {
    "x": (game.snake[0].x + game.snake_vx) % game.width,
    "y": (game.snake[0].y + game.snake_vy) % game.height
  };

  if (next.x < 0) {
    next.x += game.width;
  }
  if (next.y < 0) {
    next.y += game.height;
  }
  for (let i = 0; i < game.snake.length; i += 1) {
    if (game.snake[i].x === next.x && game.snake[i].y === next.y) {
      alert("Game over!\n(score: " + game.snake.length + ")");
      location.reload();
    }
  }
  game.snake.unshift(next);

  // Eat?
  if (game.snake[0].x === game.food.x && game.snake[0].y === game.food.y) {
    game.food.x = Math.floor(Math.random() * game.width);
    game.food.y = Math.floor(Math.random() * game.height);
  } else {
    game.snake.pop();
  }
}
The first section of code updates the snake's vertical and horizontal velocity. This is then used to calculate the new position of the snake's head and make sure the snake doesn't collide with itself. If the head does collide with the snake, a game over dialog is displayed before reloading the page.
Finally the new position of the snakes head is compared to the position of the food. If the positions match, the food is repositioned and the snake effectively grows by one; otherwise the last segment of the snake is removed to keep the snake's length consistent.
Putting it all together
Once everything has been put together you should have a working snake game prototype. At just over 100 lines, the game is obviously very simple, however it could be used as a base for additional features. For example:
- Adding a high score board
- Using sprints to improve the graphics
- Adding another snake to make the game multiplayer