Getting started with PixiJS
PixiJS is a JavaScript library for creating 2D content. Following on from last weeks post, this post is going to look at getting started with PixiJS, and using it to build a simple demo application.
Hello World
The first thing to do is grab a copy of PixiJS. This can be downloaded from the GitHub release page:
curl -O https://pixijs.download/v4.7.0/pixi.js
It's also a good idea to download the corresponding map file, however this isn't strictly necessary:
curl -O https://pixijs.download/v4.7.0/pixi.js.map
Note: a minified version is also available from the release page.
Once you've got a copy of PixiJS, create a file called index.html with
contents similar to the following:
<!DOCTYPE html>
<html>
<head>
  <title>Hello world</title>
  <meta charset="utf-8" />
</head>
<body>
  <script src="pixi.js"></script>
  <script>
    window.onload = function() {
      PIXI.utils.sayHello("Hello world");
    };
  </script>
</body>
</html>
If everything goes well, opening this page should show a web console message similar to the following:
PixiJS 4.7.0 - Hello world - http://www.pixijs.com/
Once PixiJS is working, update the JavaScript to include the following:
// Create a new PIXI application and add it to the page
let app = new PIXI.Application(320, 320, {backgroundColor: 0x000000});
document.body.appendChild(app.view);

// Create a message, centre it and add it to the application
let message = new PIXI.Text("Hello world",
                            {fontFamily: "Impact", fill: "white"});
message.x = (app.screen.width / 2) - (message.width / 2);
message.y = (app.screen.height / 2) - (message.height / 2);
app.stage.addChild(message);
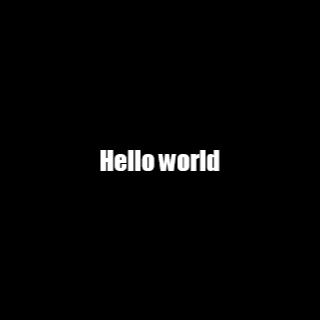
This should render a simple hello world message:

Using sprites
In PixiJS sprites are handled with the PIXI.Sprite class.
However before using the class, you need to load in textures. This can be done
using code similar to the following:
window.onload = function () {
  PIXI.loaders.shared.add(["foo.png"]).load(setup);
};
The code above will request foo.png and the call the setup function once
the image is available. A new sprite can then be created from the image in the
setup function:
function setup() {

  // Setup PixiJS application
  let app = new PIXI.Application(320, 320, {backgroundColor: 0x000000});
  document.body.appendChild(app.view);

  // Create and centre sprite
  let foo = new PIXI.Sprite(PIXI.loader.resources["foo.png"].texture);
  foo.x = (app.screen.width / 2) - (foo.width / 2);
  foo.y = (app.screen.height / 2) - (foo.height / 2);
  app.stage.addChild(foo);
}
The end result should look something like this:
![]()
Note: the sprites used in this post were created by Seth Bryd, and are licensed under the Creative Commons Zero (CC0) license.
Animated sprites
Instead of using single images, it's often useful to use a sprite sheet similar to the following:
![]()
Code similar to the following can then be used to create an animated sprite
using the PIXI.extras.AnimatedSprite class:
let frames = [];
for (let i = 0; i < 4; i += 1) {
  let texture = new PIXI.Texture(PIXI.Texture.from("foo-sprite-sheet.png"));
  texture.frame = new PIXI.Rectangle((i * 64), 0, 64, 64);
  frames.push(texture);
}
let foo = new PIXI.extras.AnimatedSprite(frames);
The gotoAndStop and gotoAndPlay methods can then be used to control which
frame should be displayed. For example:
foo.gotoAndStop(2);
Adding a game loop
There are a few different ways you could add a game loop, however one of the
easiest is adding a handler function to app.ticker. This function will then
be called every time PixiJS re-renders the application:
app.ticker.add(function(delta) {
  // Set velocity based on keyboard input
  let xv = 0;
  let yv = 0;
  let speed = 3;
  if (keys[37]) { xv -= speed; }
  if (keys[38]) { yv -= speed; }
  if (keys[39]) { xv += speed; }
  if (keys[40]) { yv += speed; }

  // Update position
  foo.x += xv;
  foo.y += yv;
  if (foo.x < -foo.width) {
    foo.x += app.screen.width + foo.width;
  } else if (foo.x > app.screen.width) {
    foo.x = -foo.width;
  }
  if (foo.y < -foo.height) {
    foo.y += app.screen.height + foo.height;
  } else if (foo.y > app.screen.height) {
    foo.y = -foo.height;
  }

  // Set frame to match direction
  if (xv > 0) {
    foo.gotoAndStop(1);
  } else if (xv < 0) {
    foo.gotoAndStop(2);
  } else if (yv < 0) {
    foo.gotoAndStop(3);
  } else {
    foo.gotoAndStop(0);
  }
});
The tick function above assumes a global keys object is updated. This can be
done with code similar to the following:
var keys = {};

window.onkeyup = function(key_event) {
  keys[key_event.keyCode] = false;
};
window.onkeydown = function(key_event) {
  keys[key_event.keyCode] = true;
};
The animation loop should now be able to move and update the sprite based on keyboard input.
Next steps
The demo in this post is obviously fairly simple, if you want to go further with PixiJS I would recommend having a look at the PixiJS API documentation and some of the examples on PixiJS.io.
